Tuesday, May 19, 2015
Spring Kit Highlander Games 3 and 4
What: Highlander Format League (Spring Kit)
When: May 1 to 31, 2015
Where: Neutral Grounds - Glorietta 2
How: Best of Five Games
For the Spring Kit prize support, Neutral Grounds is holding a
month-long league gaming using a home brew Highlander format. No exact
same list is to be used more than once in any of the player's five
games. Similarly, no unique pilots or unique upgrades can be used more
than once. Interesting! The trick is to be extra conservative with using
useful unique cards and keeping it "sprinkled" through all the five
unique squadrons of each of my games.
I'll keep a battle report of my games as I go through the league. Here are my third and fourth games and
HERE is a link to my first two.
Battle Report
Game 3
vs. Emcee's Rebel Squadron
* 2x Blue Squadron Pilot (B-wings with Fire-Control System and Ion Cannon)
* 2x Gold Squadron Pilot (Y-wings with Ion Cannon Turret and BTL-A4 title)
My Squadron:
* Corran Horn (E-wing with Push the Limit, R2-D2, Advanced Sensors, and Engine Upgrade)
* Blue Squadron Pilot (B-wing with Flechette Cannon, B-wing/E2 title, and Tactician)
* 2x Bandit Squadron Pilot (Z-95 Headhunters)
It's a Fat Corran list with a mini-swarm. I was able to squeeze in a Flechette Cannon and a Tactician on the B-wing for the potential to hand out two stress tokens in a turn. The idea is obviously to joust with my mini-swarm and keep the enemy ships busy while Corran flanks for his devastating double tap attack.
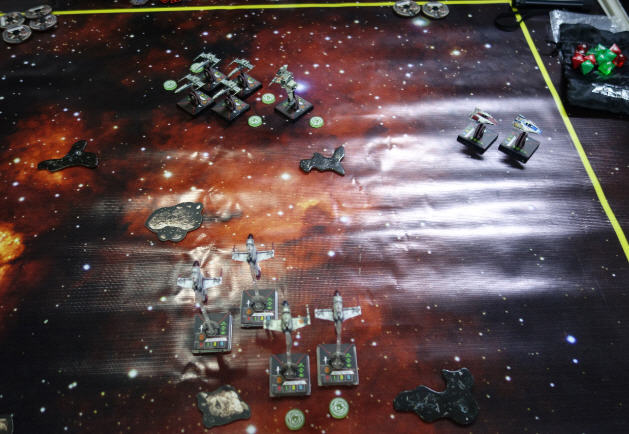
I placed my mini-swarm in the middle of the board which has his bees on the exact opposite edge. I deployed my E-wing on the far left corner to pincer to the right towards the center where I think the furball will occur. His Y-wings are deployed on the upper right corner of the table. We both pushed forwards conservatively on the first few turns while I continue with Corran as planned. By third turn, the E-wing is exactly on the left flank of the B-wing contingent.
 |
| first few turns |
The first joust saw two of my ships (the lead zee and the bee) ionized with minimal damages to one of his B-wings' shields. Both shook it off the next turn with mandatory ion moves while the other Z-95 jinked right in the hope of blocking a B-wing (the left one in the photo below), a strategy that failed as the bee halted just within Range 1 with target lock to boot. Uh oh!
Corran Horn shot first and stripped the leftmost B-wing of its shields. That B-wing shot at the lead Z-95 with four attack dice and turned it to space dust. The other bee settled to do ion shots at my own B-wing and successfully handed an ion token. The Y-wings shot ion beams on the flanking E-wing in vain. I shot back with my other ships and it only scratched some shields off the enemy tanks.
Corran Horn double tapped to finish off the damaged B-wing.
 |
| the joust |
The Y-wings shot past the joust and up towards the E-wing. A good block! Corran Horn overlapped the lead tank. His remaining bee zipped left and out of the battle while mine just did his mandatory ion move. My remaining zee k-turned back to action. Corran, my B-wing and the Z-95 all shot at the same trailing Y-wing and scratched more shields. Its return-shot put another ion token on the Correlian pilot.
 |
| Corran in trouble |
The E-wing did an ion-move forward. One of the Y-wings k-turned right behind it, rearing for another ion shot! What a pesky dogfighter! The other Y-wing continue to circle out of combat while his remaining B-wing k-turned back to action. My bee opted to shoot at the Y-wing that is flanking Corran instead of the more damaged Y-wing that is flying away the furball with the intent of going for the more immediate threat.
After a round of shooting, Corran is still ionized from the trailing Y-wing while the rest of my squadron just managed to do minimal damages on his ships. My E-wing is being escorted towards the board edge! At this point (with no shields and a single hull damage), I am praying for just one round of respite from his ion guns so I can have it run away and recharge its shields through Artoo.
 |
| pesky Y-wing on Corran's tail |
Corran did another ion-move forward, the pesky Y-wing still on its tail. My B-wing k-turned right behind it to shake it away from the endangered E-wing. My zee positioned to joust at the enemy bee who is just about to get back to the furball. His remaining Y-wing is having a trouble circling back to action. It will be irrelevant for a few a turns.
Both ion shots from his Y-wing and B-wing missed! The respite I was hoping for at last! I dealt further damage to his tanks which by now are stripped of their shields.
 |
| a respite from ion hits |
His B-wing positioned so that its firing arc covers a large area on the left flank of the E-wing. The Y-wing continued its slow pace forward to cover the escaping E-wing's right flank. My own squadron moved past the enemy formation and readied to get back to action next turn instead. With my E-wing free to do his movement shenanigans, I settled to end up on the best position available to me which is (after a barrel roll and a boost) on Range 3 of the Y-wing BUT precariously a few inches away the table edge. It's a gamble I have to take as the other maneuver options will lead me within the sights of two ships - the B-wing and the other Y-wing which is just now returning to combat.
The gamble paid off as the only Y-wing that can hit Corran missed its ion shot. Thank the Maker!
 |
| risky E-wing maneuver |
The E-wing did a tight escape heading away from the table edge and recovering shields with Artoo while the rest of my squadron reared back to block the chasing tanks and do as much as they can to scratch off more hulls from the enemy ships. His squadrons are very much reformed at this time to give a chase.
 |
| his tanks give chase |
He is able to spread out his net that no amount of fancy flying can make the E-wing escape his ion cannons. Corran Horn braced for the inevitable and gets hounded by several ion shots down to destruction. My squadron slowly chipped at the thick hull of the enemy fighters and managed to finally destroy his remaining B-wing. One of the BTLA4 warthog double tapped my remaining Z-95 to oblivion.
Suddenly, the table is clean save for space debris.
 |
| final turns |
My B-wing is able to destroy one more Y-wing before its wingman avenged its demise. Victory to the Y-wing aces!
(Me: 77 points - Emcee: 100 points)
Game 2
vs. Jojo's Empire Squadron
* 4x Academy Pilot (Tie Fighters)
* Royal Guard Pilot (Tie Interceptor)
* Soontir Fel (Tie Interceptor with Push the Limit)
My Squadron:
* 2x Blue Squadron Pilot (B-wings with Ion Cannon)
* 2x Blue Squadron Pilot (B-wings with B-wing/E2 title and Tactician)
I'm liking having a control component on my squadron lists but until this match I only used splashes of control units. I never thought that it can be a good idea to do a list with all ships capable of disruption. For this match, I wanted to try it out and prepared a tanky composition that can hand out stress and ion tokens like its Christmas gift-giving at the Ellen DeGeneres Show.
Hello swarm. With a competent player at the helm of this list, I'm running simulations in my head as early as while setting up the asteroids on how can I avoid the swarm felling my bees one by one with focus firing (and most likely flanking squints). Definitely, I would want to hand out stress as soon as I can on the Interceptors to negate its superior agility. Once it starts arcdodging, my fighters are sure as dead.
Deployment starts with my bees turtled at the left corner of the table while he set up Baron Fel right across it with the eyeball swarm in the middle and the Royal Guard on the far right for a possible pincer to the left.
The first few turns are mostly positioning. I only ranged a few forward-1's until he is able to complete his leftward pincer. That red squint sure is scary, directly threatening my right flank with my bees having no hope of firing back. The rightmost B-wing lost shields while my retaliatory shots only managed to shake a few eyeball hulls and practice the Baron's evasion skills.
 |
| first few turns |
The next turn made an ugly furball. The eyeballs moved in to try and block my B-wings to establish a good shooting position. My lead fighter overlapped his lead TIE Fighter and the rest of my B-wings bumped behind it save one (the leftmost ship) who slowly crawled ahead in the hope of catching Fel right in front of its sights.
It's a good call. Fel stopped right in front of the leftmost bee with a few millimeters to spare to have a firing solution against it. That B-wing will live for now... what a breather. In turn, the Baron is wide open for an ion volley that can send it off board. The other squint went through the space debris to flank right on my squadron.
 |
| the joust |
Three red ion dice all hit against Baron Fel! With an evade token online, Soontir rolled three evades! Argh! Like a true fighter ace of the Empire! The rest of my B-wings destroyed only one TIE Fighter from that furball. While concentrated fire from his swarm destroyed my previously damaged B-wing (the one with a Tactician).
 |
| the Baron's evasive skills |
 |
i can see the voided Tactician from here
|
One of my B-wings tore free from combat and k-turned right behind the TIE swarm. The other tried to block his Royal Guard ship but it just went past the joust and landed right within the sight of the leftmost B-wing... another opportunity to ion it off the table. Baron Fel curved left to avoid the board edge while another TIE fighter k-turned to tail an overlapping B-wing.
Both of our ships traded hull and shield damages. My leftmost B-wing successfully ioned the TIE Interceptor off the table this time.
 |
| bye Royal Guard... don't forget to write |
Two of my ships k-turned back into action and the net of its firing arc is wide enough to catch all enemy ships within sight. Two of his eyeballs k-turned to get back to combat but the rear TIE Fighter caught the Baron on an overlap. The ensuing shooting saw Soontir Fel get damage from an ion cannon from the leftmost B-wing again while Range 1 shots destroyed a TIE Fighter. Minimal damage on my shields are taken from the return fire.
 |
| the Baron caught an ion token |
Fel did the mandatory ion move forward. Two of my B-wings gave chase. One k-turned to face a passing TIE Fighter in Range 1 while the other eyeball is well away from the furball. My combat phase this turn is crap and Soontir managed to evade the ion shots.
 |
| a crappy round of shooting for me |
Both of his remaining TIE Fighters turned back to the fight. I decided to focus more on these ships rather than giving a wild chase on the more nimble TIE Interceptor which is now free to do his movement shenanigans. I k-turned one B-wing to get two of these ships facing off the eyeballs for a joust while leaving one to do a potshot at Soontir who is heading away from combat.
After the tradeoff, my B-wings destroyed one eyeball and a nice target lock assisted Range 3 roll from an ion cannon delivered the final damage needed to decimate Baron Fel. The remaining TIE Fighter, quick to avenge his squadron mates, finished the remaining hull off the leftmost B-wing.
 |
| an ace fighter for a Blue Pilot... a good trade |
From there, it's just catch-the-eyeball time with only one B-wing stripped of its shields and another that is still almost healthy against his damaged TIE Fighter. Victory to the bees!
(Me: 100 points - Jojo: 50 points)
Realizations:
- Emcee is a wolf in noob's clothing.
- A ship can do an Action as normal after doing the mandatory ion movement.
- Respect the Y-wing's dial on a capable opponent's hands.
- Control configured ships are not bad at all. I've always thought that one can easily shrug off ion and stress tokens as irrelevant until I am on its receiving end. Really annoying!
Inscribed by Interrogator-Chaplain Randel on 3:41 PM


******************************************************************************
Tuesday, May 12, 2015
Spring Kit Highlander Games 1 and 2
What: Highlander Format League (Spring Kit)
When: May 1 to 31, 2015
Where: Neutral Grounds - Glorietta 2
How: Best of Five Games
For the Spring Kit prize support, Neutral Grounds is holding a month-long league gaming using a home brew Highlander format. No exact same list is to be used more than once in any of the player's five games. Similarly, no unique pilots or unique upgrades can be used more than once. Interesting! The trick is to be extra conservative with using useful unique cards and keeping it "sprinkled" through all the five unique squadrons of each of my games.
I'll keep a battle report of my games as I go through the league. Here are my first two games.
Battle Report
Game 1
vs. Keith's Empire Squadron
* 4x Sigma Squadron Pilots (Tie Phantom)
My Squadron:
* Blue Squadron Pilot (B-wing with Ion Cannon)
* 2x Blue Squadron Pilots (B-wings with B-wing/E2 modification, and Tactician)
* Gold Squadron Pilot (Y-wing with R3-A2, Ion Cannon Turret, and BTL-A4 title)
I want to try out several lists that I will have no chance testing on casual games (because I don't do much casuals). This one is a control list using Rebel tanks. The more popular variant is having three Tactician Bees but I opted for a single Ion Cannon carrier as a utility for big ships. With two ships that can hand out an ion token, I have the option to ionize a big ship in one turn. At least, that's the idea.
Now, into the game. Glass cannons versus tanks. His squadron shoots first and can maneuver around my slow ships with ease. My only hope is if I can get to shoot back (preferably at Range 2) and disrupt him with stress/ion before he can chew into my shields. I also have this conscious effort to predict his moves so I can block him and deny him that precious cloaking action. Ultimately, what challenged us really is to unlearn the old cloaking rules. LOL.
I deployed on the middle-right with the intention to turtle towards a joust. He deployed spread out on his table edge. A pair of Phantoms look menacing on the upper right corner with the possibility of a flank attack that I may not be able to answer with two other Phantoms harrying my front.
 |
| right after Turn 1 |
I slowly moved forward, doing straight-1's a couple of times to suck him within my preferred range. I was able to sucker one of the Phantoms into it and it paid the price by catching all focused shots from my squadron. One of the other Phantom successfully flanked me from the left without my squadron being able to shoot back at it. Volleys from both Imperial ships stripped the shields out of a B-wing. The other two surprisingly took the long route to flank me to right
 |
| got me a Phantom |
With the possibility of my ships flying past the Phantoms on my left and right flanks, I instead K-turned with everything but a single B-wing that got too cocky and elected to face two Phantoms closing in from the right by doing a stressful hardturn-1. The left-flanking Phantom overshoot and landed right in front of my squadron. With nothing to shoot at, it just cloaked to try evading three of my ships. It took quite a focused firing from all those ships to destroy it at 4 defense dice.
The right-flanking Phantoms took their chance on destroying the shield-less B-wing at Range 3 (upper leftmost B-wing in photo). They are able to chip out more hull points but not enough to disable the ship. The return volley from the lone B-wing failed to take out one of the Sigma pilots but it's just within Range 2 so it got stressed from the Tactician.
 |
| all my ships are stressed |
My squadron moved around the asteroid to go back to formation hoping to block the Phantoms' flight path. I was successful in blocking one (stopping him right in front of the rest of my ships) while the other overshot my formation. The blocked Phantom tried shooting at the damaged B-wing but with the help of a blocking asteroid (and a lucky roll), it managed to survive yet again with his last point of hull! The same Phantom survived a return fire from a B-wing with a loss of a shield.
 |
| joust |
My formation is now on disarray, struggling with sucky dials to turn back and give chase to the more agile Phantoms. One of the returning Phantoms unleashed a volley of laser fire to the damaged B-wing, finally destroying it while the other cloaked and dodged return fire from my B-wings.
 |
| scrambling back to formation |
My remaining pair of B-wings maneuvered back to a more favorable position, gaining a wider arc of LOS to hopefully trap the Phantoms. The Y-wing is still struggling to get an opportunity to K-turn and return to action. One of the Phantoms is caught within the net of the B-wings' firing arc and got destroyed while the other fleeing Phantom is able to move out of combat, cloaked and safe.
 |
| the chase |
At this point, it's just a matter of giving chase to the wayward Phantom and hoping to penetrate its cloaked defense. It happened once I got it trapped on the upper right corner of the table. Victory to the Rebel cause!
(Me: 100 points - Keith: 25 points)
Game 2
vs. Keith's Empire Squadron
* 4x Royal Guard Pilots (Tie Interceptor with Push the Limit)
My Squadron:
* Chewbacca (YT-1300 with Predator, C-3P0, and Millennium Falcon title)
* 3x Bandit Squadron Pilot (Z-95 Headhunters with Cluster Missiles and Munitions Failsafe)
This time I want to try out missiles! In about a year and a half of X-Wing gaming, I am only able to try out this one-shot goodies just now. Not really a fan but there's no harm trying to experience myself how it really works. Except for the missile zees, the list is not too original. It's just a fat Chewie and a mini-swarm, so the idea is to immediately have the swarm cause disruption to enemy formation while Chewie just tries to survive while shooting back with an active Predator effect.
His squadron is again shooting first and with Push the Limit, can be really maneuverable and hard to hit. I can imagine that my first list will not work as great against this as the royal squints have a number of green maneuvers to shrug of stress. My initial plan now is to have the zees zoom to Range 1 and block as many ships as I can to deny the Push the Limit effect while posturing to deliver my payload.
I setup Chewie on the lower left corner with the zees right beside it. He deployed exactly across my squadron with just a few asteroids along the way. The first few turns is pure posturing with my zees slowly creeping up, Chewie flying behind it, and his squints just moving sidewards in their deployment zone to further wait my squadron's intent.
 |
| first two turns |
When the headhunters got closer to the enemy formation, he sent two royal squints to engage while Chewie flying behind the formation, swing to the right and landed on an asteroid... like a noob! Both interceptors punished the poor flying, stripping off the Falcon with its shields.
 |
| noob in the asteroid |
Next turn, I banked all the zees to the right to approach the enemy squadron. They started putting up target locks everywhere. I sent Chewie straight up to hope on blocking the engaging interceptors. I cringe at the potential Range 1 shots from the royal squints but I have faith that the Falcon will hold and that should be enough to sway me to commit.
The royal guards' volley of fire dented the Falcon's hull down to four. Big thanks to Threepio! A Z-95 loosen its missiles and together with primary weapons fire from the other zees, was only able to scrape off some hull points on a squint. Chewie finished it off with a Range 1 shot.
 |
| joust |
After that pass, the squints scattered past my formation (but not before I was able to establish more target locks with the headhunters) save one who I was able to block with a Z-95. Chewie is the only available ship to shoot that turn and failed to destroy the overlapping interceptor with its superior agility. The royal guards was able to quickly get back for another joust while my zees struggled to turn around. Chewie is the lone bright spot on my squadron with its 360 turret laser. Not enough to go past the interceptors' defense though.
 |
| reform |
One interceptor flanked Chewie from the left while my mini-swarm went back to formation. In addition to a building series of unlucky rolls from Keith, the Range 1 shot from the flanking interceptor did not go through the Falcon title + Threepio evade tokens. The return fire proved fatal to a straggling interceptor that happened to land right in front of the reformed zees. It's unworthy to note though that another cluster missile failed to create much damage. The measly two primary attack dice from the other headhunters proved luckier.
 |
| red squints everywhere |
Now in formation, my mini-swarm zipped back to action and closed the distance to the Falcon who is being harried by both of the remaining Interceptors. The flanking royal guard followed the YT-1300 and ended up on its rear at Range 1. Chewie barely missed an asteroid with a hairline's width. Some flying. The squint on the right was able to strip the shields on the lead Z-95 while the other dropped further damage to Chewie's hull but still not enough to finish it. My return fire destroyed the trailing Interceptor much to more of my opponent's unlucky rolling (zero evades on four defense dice!).
 |
| another joust |
After that pass, the remaining Interceptor destroyed the damaged Z-95 but that means getting inside the firing arc of another headhunter. I was not able to destroy it but left it with two critical hits. The next turn is just a mop up, with both remaining zees catching the remaining Imperial ship within sight. The interceptor failed yet again to finish off Chewie at Range 1. Return fire from my squadron is overkill. Victory to Rebel fighters!
 |
| Chewy is alive! |
(Me: 100 points - Keith: 17 points)
Realizations:
- A single warthog can't do crap. I'd rather have not used the BTL-A4 upgrade to capitalize with the ion turret's 360 shot instead. That ship's maneuver dial is just bad to rely on it to catch agile ships within its primary arc.
- I still don't like missiles. The cost of spending a target lock is too much for a single-shot opportunity. Lowering the pointage cost should balance it.
- One of my original plan is to use a YT-1300 Chewie paired with a YT-2400 Leebo. I realized it's trying too much egg in a single list. I'm glad I didn't. Now, I can enjoy practicing with a YT-2400 Leebo on another game instead.
- It's still confusing to play with the new cloaking rules. I kept on thinking of the old way how the Tie Phantom decloaks.
- Fortune favors the bold. Although there's an asteroid crash from time to time.
Inscribed by Interrogator-Chaplain Randel on 3:30 PM
******************************************************************************