Saturday, July 05, 2014
Rebel Resurgence
Finally, I get to join an X-wing tournament! This one (dubbed "Rebel Resurgence") is sponsored by Neutral Grounds, TO'd by Red Leader Luigi, and held in SM BF last June 21. After three matches, I was able to bag the second spot, securing a first round BYE on the upcoming Regionals.
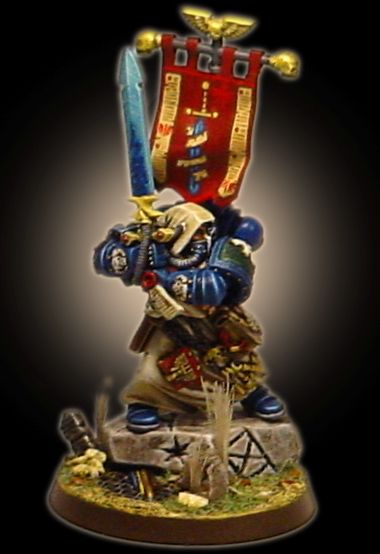
Here is the squadron I used and I call it the "Baron's Dagger".
- Soontir Fel (Tie Interceptor with Push the Limit)
- Carnor Jax (Tie Interceptor with Push the Limit and Stealth Device)
- Bounty Hunter (Firespray-31 with Gunner)
The idea is to joust with the Firespray while the squints hop around, evading firing arcs with the use of boosts and barrel rolls, and chewing away at stragglers. I usually flank with Jax to either divide the attention of the opposing squadron (and when he's chased, he can easily get back to his squadron with the squints' infamous mobility leaving the chasing units to waste a turn or two to double back) or to capitalize on his ability by quickly zooming within range 1.
Battle Report:
Match 1
vs Keith's Squadron
* Howlrunner (Swarm Tac)
* 4x Academy Pilots
* Captain Yorr (Vader, Adv Sense, Anti Pursuit)
 |
| opening |
I deployed everything on the lower left corner with Jax a couple of inches away on the formation's right wing. I plan to draw any piece of the swarm to him to lessen its biggest advantage - concentrated firepower. I don't want to joust with a concentrated swarm. Keith deployed on the upper right corner with the swarm leading the pack and Howlrunner lagging behind, just enough to distribute his ability around.
 |
| midgame |
Keith did not fall for the Jax bait and moved the entire swarm to engage the Bounty Hunter and the Baron, inadvertently exposing his flank after the shuttle took potshots at the red squint. I moved in Jax to exploit that flank and, with aid from some very lucky dice rolling, was able to gun down two eyeballs in a single turn.
 |
| the fall of Jax |
|
|
The Bounty Hunter overshoots the shuttle and its escorts while the Baron was able to gun down another eyeball. I did not expect one of the Ties to make a conservative move (and the shuttle to stall) so Jax overlapped, making the worst blunder an Interceptor can do - to have it skip its action. The opponent capitalized and kapoof goes Jax!
 |
| dogfight |
Howlrunner chased the Bounty Hunter while the latter does a stressful K-turn to go back in combat. Soontir Fel chased down the remaining Tie Fighter under the heavy fire of the Lambda shuttle.
 |
| evasive maneuvers |
The Bounty Hunter readies for a rear arc shot. Soontir disengaged from hounding the shuttle to help go against Howlrunner. The Lambda and its remaining Tie escort maneuvers to head back to the action.
 |
| time's up |
The Baron chased the Tie Fighters while the Bounty Hunter goes for the shuttle as the TO called for time. With three Tie Fighters down against my Carnor Jax as casualties, I won only by a slight margin. A minor victory for me.
1 - 0
Match 2
vs Mark's Squadron
* Howlrunner (Swarm Tac)
* Night Beast
* 2x Academy Pilots
* 2x Scimitar Squadron (Cluster Missiles)
Another swarm! Gah! The plan right out of my head is to put down those loaded Scimitars before the concentrated firepower puts down any of my ship. I'll try to go bait Jax again like in the first match.
 |
| deployment |
Same deployment as Match 1. Jax is a bit far off the right wing to either flank or act as bait. My left corridor is open for the less agile Bounty Hunter to commit to a joust if the opponent will. I'll take it.
 |
| opening movements |
I took the open corridor with my Bounty Hunter. Both elite Interceptors moved through the asteroids to commit on the middle of the table. I did not expect Mark's move after as all of his nimble Ties and Bombers swept sideways (to the upper right of the table) and away from my formation. First thing that came to my mind is he probably is trying to bait my Interceptors to overstretch themselves away from the support of my Bounty Hunter.
 |
| full swing ahead |
I did a conservative move after that just to check his next move (and validate my theory). However, instead of taking the right flank, he K-turned his lead Bombers that sends out a message that he will be doing the same with his Ties. I think his aim after all is to draw me to his side of the table, which is clear from asteroids, and take full advantage of the combined firepower of his swarm.
On the other hand, I saw his stressed Bombers as an opening and quickly sent my squadron full throttle ahead to engage the enemy while they reform.
 |
| the joust |
The eyeballs and a well-placed cluster missile shot walloped a punishing volley on the Bounty Hunter, sending it to Kingdom Come! The elite Interceptors took revenge by taking down a single Bomber.
 |
| round about |
The Interceptors flew away from melee (after Baron Fel shot down one more eyeball) and rounded about to go back to combat. The enemy positioned his own Ties to face the coming Interceptors. Numbers is still with him so I have to be careful with my positioning to evade as much of his firing arc as possible.
 |
| the joust, part 2 |
After the next round of jousting, I was able to take out two more eyeballs with minimal damage on the elite Interceptors. From there, I just K-turned back for another joust and with the advantage of numbers taken off the swarm, my squints and their superior mobility easily took out the remaining ships for the win. Frankly, I almost lose hope when the Bounty Hunter was destroyed.
2 - 0
Match 3
vs Pao's Squadron
* Blue Squadron
* Green Squadron (Assault Missile)
* Dutch Vander (Ion Cannon Turret)
* Garven Dreis
Giving up on the style of my first two deployments, I'll go with running the two Interceptors together. The initial aim is to flank him while the Bounty Hunter ram straight to his formation. It's very risky to lose the Bounty Hunter early on, especially with the very synergistic list of the opponent. But the last match boost my faith on the squints even after losing the Firespray.
 |
| deployment |
I did not expect for Pao to deploy this way. He went with the slower (but tougher) ships (B and Y) adjacent my squints and deployed the other two farther off. I can only guess that he wanted my Interceptors to commit on jousting with the tough Rebel ships, endure with thicker hull and shields, then focus fire on my ships one by one.
 |
| after turn 1 |
The Rebels started slow with the Y and B, but zoomed ahead with the A and X. I see him closing down on my ships with a pincer move in the middle of the table. With faith in Agility 3 and 4, I committed my Interceptors in a joust against the slower Y and B despite their flanking friendlies. I am also readying a flanking move from the Bounty Hunter. I am hoping for it to finish what damages the Interceptors can inflict against the Y+B pair.
I know I'm done if the Interceptors won't hold after the joust.
 |
| joust |
I was surprised that the Y+B pair went for the flanking Bounty Hunter. I was able to scratch some of their shields before we all overlapped in the middle of the table and made passes for a second round of joust. I got scared there for a bit as my overlapped Jax lose action and become a sitting duck for the flanking A+X pair. Luckily, it held.
 |
| next joust |
But not for long. After the next joust, Jax finally went kapoof but not without doing damage on the enemy. The A-wing fell. Another pass, but at this point, Pao can't rely on the squadron's synergy because they are too far from each other. I had the Baron chase and chew after the Y-wing, while praying not to get ioned! Luckily, no ion shots got in and I was able to destroy the tough Y-wing.
 |
| end |
Two against two. The nimble Baron and the Bounty Hunter that barely got scratched, against a B and an X that barely had their shields. It's just a matter of slowly chewing away their shields while the Baron evades firing arcs. The B-wing went down first then the X-wing next. Victory for the Baron's Dagger!
3-0
Inscribed by Interrogator-Chaplain Randel on 12:05 AM


******************************************************************************